Technical Specification
Swagger Documentation
ilink uses an OpenAPI 3 specification with a Swagger client, available here. In this web client, you can perform test calls to our API, analyse the responses obtained, and verify the data to be sent for each endpoint/method.
The Swagger client provided above should accompany your development process. It is also possible to check how API calls are constructed via cURL (see example below):
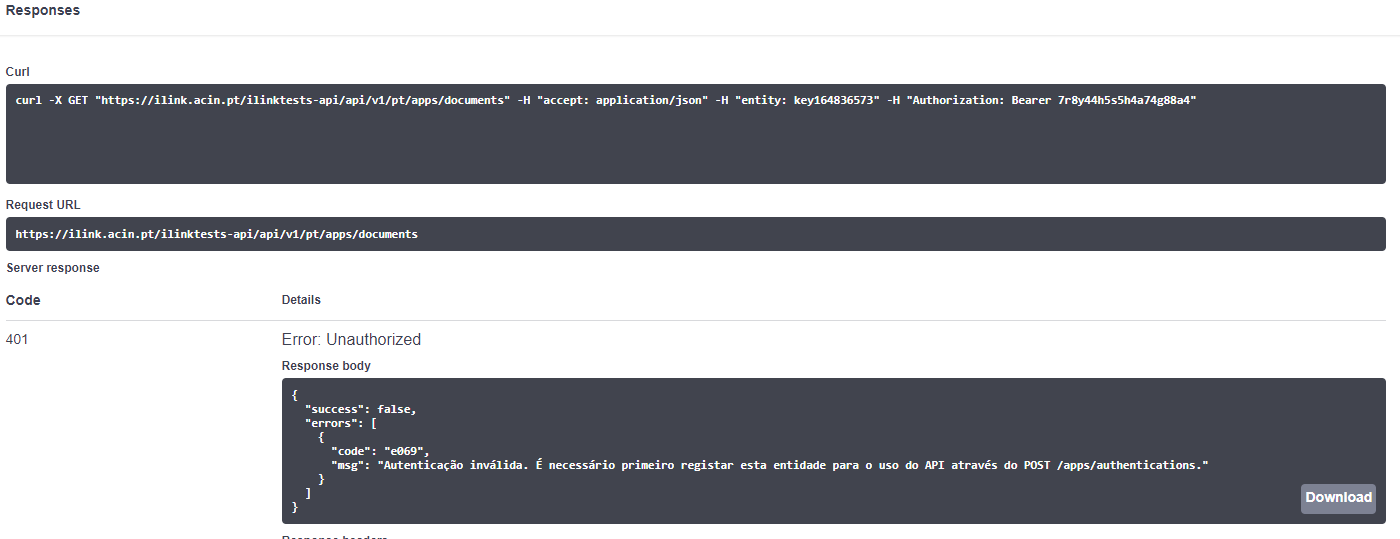
Note: Several HTTP clients, are also provided, in over 50 languages and frameworks, automatically generated from our specification, which can serve as an initial support for the integration process.
Authorisation (OAuth2 Client Credentials)
The ilink API uses the OAuth2 Client Credentials flow for authentication and authorisation. This is the recommended method for all new integrations.
Obtaining the Access Token
To access the API, you must first obtain an access token via the POST /oauth2/token endpoint. This process requires sending 5 parameters:
| Parameter | Value | Description |
|---|---|---|
| grant_type | client_credentials | OAuth2 grant type (fixed value) |
| client_id | Provided by the ilink team | Unique identifier of your application |
| timestamp | Current UNIX timestamp | Current time in seconds. Must be synchronised or very close to the current time |
| nonce | Random value (up to 20 characters) | Unique alphanumeric value generated for each request |
| signature | HMAC-SHA256 signature | Calculated cryptographic signature (see below) |
Generating the Signature
The signature is calculated using the HMAC-SHA256 algorithm and must follow the formula
base64_encode(HMAC_SHA256(CLIENT_ID:TIMESTAMP:NONCE, CLIENT_SECRET))
Practical Authentication Example
Suppose you received the following credentials from the ilink team:
- client_id:
demoapp - client_secret:
qwerty
Step by step:
- Get the current UNIX timestamp. Example:
1765812050(seconds since January 1, 1970) - Generate a random nonce. Example:
aYb89a8yf10 - Concatenate the values with ":". Result:
demoapp:1765812050:aYb89a8yf10 - Apply HMAC-SHA256
- Use the private key (client_secret):
qwerty - Online tool: HMAC-SHA256 Generator
- Result:
ff293edc63f0134ffa44ae04a6900e2ee43060aff620413b003c4e5eefbea949
- Use the private key (client_secret):
- Encode in Base64
- Online tool: Base64 Encoder
- Final signature:
ZmYyOTNlZGM2M2YwMTM0ZmZhNDRhZTA0YTY5MDBlMmVlNDMwNjBhZmY2MjA0MTNiMDAzYzRlNWVlZmJlYTk0OQ==
Final data to send:
POST /oauth2/token

{
    "grant_type": "client_credentials",
    "client_id": "demoapp",
    "timestamp": 1765812050,
    "nonce": "aYb89a8yf10",
    "signature": "ZmYyOTNlZGM2M2YwMTM0ZmZhNDRhZTA0YTY5MDBlMmVlNDMwNjBhZmY2MjA0MTNiMDAzYzRlNWVlZmJlYTk0OQ=="
}
After sending the data above, the response below is returned, containing an access token for the API:
HTTP status: 200 OK

{
    "access_token": "eyJ0eXAiOiJKV1QiLCJhbGciOiJIUzI1NiJ9.vv6zhqgZYACxyALv03AplewBVgDgXq_9vOI4iLcAxWY",
    "token_type": "Bearer",
    "expires_in": 1800,
    "scope": "document_create,document_read,states_read"
}
This access token has a duration of 30 minutes and must be included in all API requests in the header below:
- Authorization: Bearer {ACCESS_TOKEN}
In the Swagger client, the authorisation process is performed by entering the access token after clicking the Authorize button.
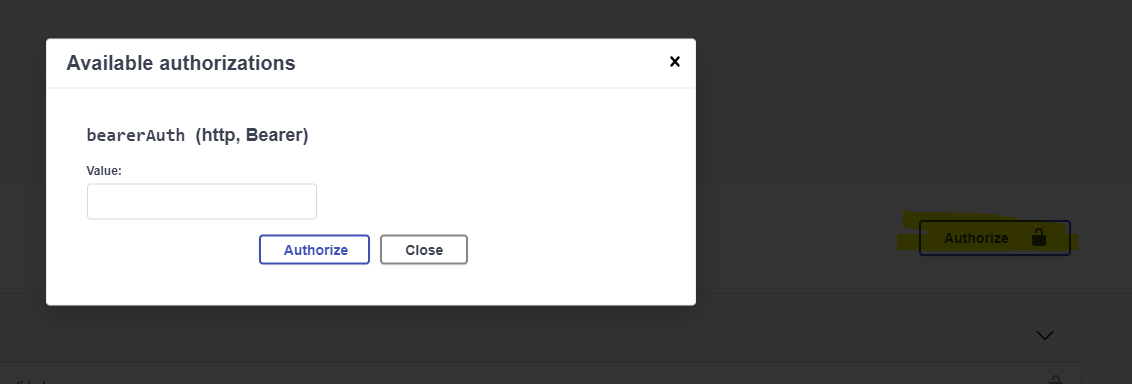
After this step, note that all subsequent API requests include the Authorization header:

Important: When the access token expires, the following response is returned on all requests, and it will be necessary to renew the access token by repeating the process described above:
HTTP status: 401 Unauthorized

{
  "success": false,
  "errors": [
    {
      "code": "e069",
      "msg": "Invalid authentication"
    }
  ]
}
Authorisation (Legacy)
Note: New integrations should follow the OAuth2 method described in the previous section. For reference, the Legacy Authorisation method is detailed in this section.
All requests made to the API must include the following authorisation header:
- Authorization: Bearer {TOKEN_PLATAFORMA}
In the Swagger client, the authorisation process is performed by entering the platform token after clicking the Authorize button.
After this step, note that all subsequent API requests include the Authorization header:
Before making the first call to the ilink API, authentication per customer/TIN is required. This authentication serves as an initial handshake between the customer and ilink and is performed via the endpoint POST /apps/authentications:
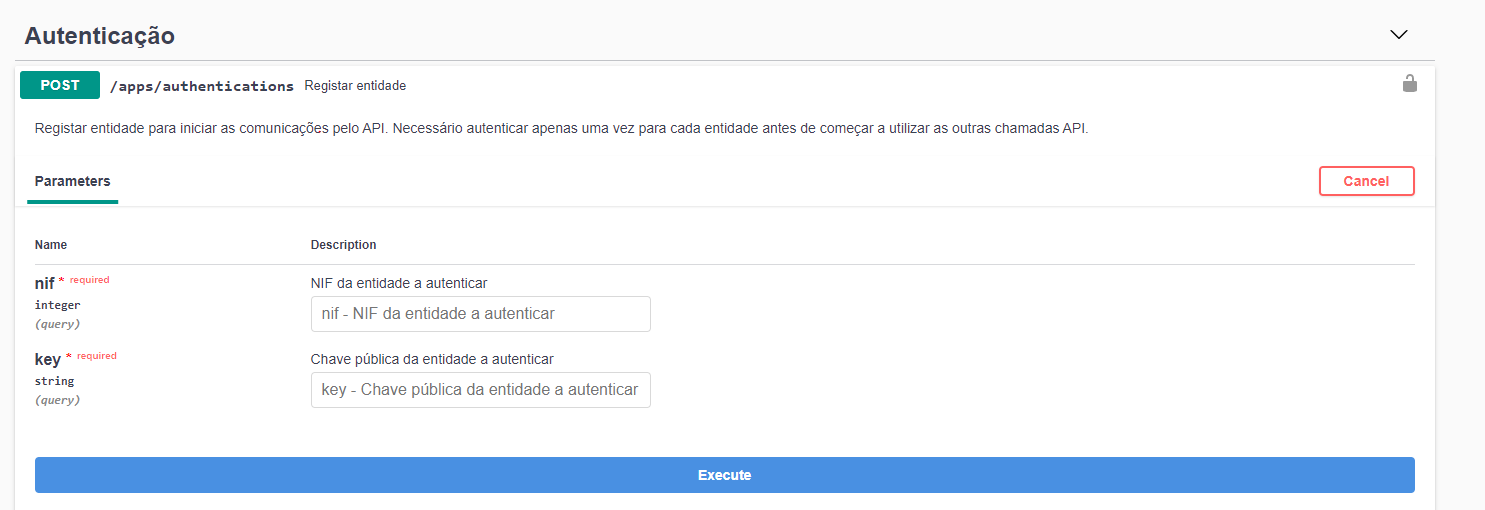
A valid authentication should return this response:
HTTP status: 200 OK

{
  "success": true,
  "message": {
    "code":"e123",
    "msg":"Integration completed successfully."
  }
}
Authentication is valid indefinitely (only needs to be invoked once per customer/TIN accessing the API). It can also be revoked using the DELETE /apps/authentications method:
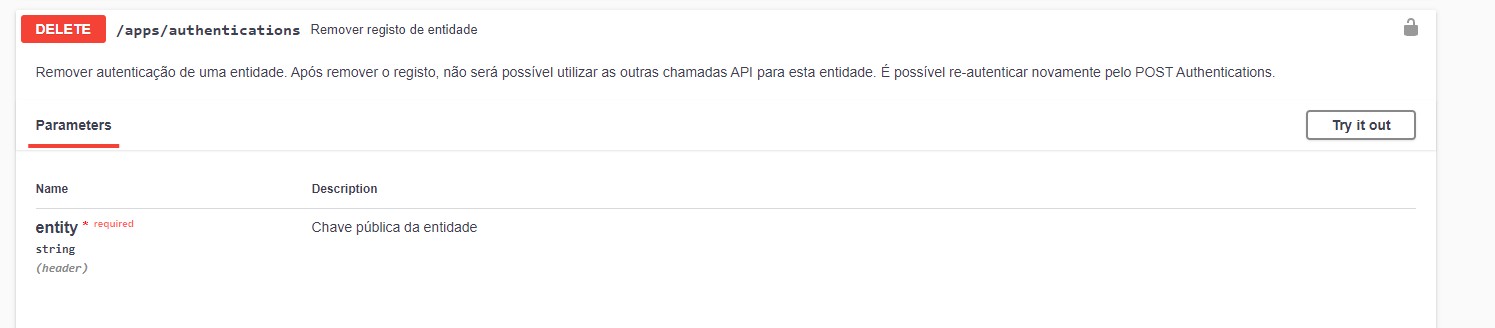
If the authentication process is not completed, or the Authorization header is not sent in API requests, all calls will be rejected for that TIN with the following error:
HTTP status: 401 Unauthorized

{
  "success": false,
  "errors": [
    {
      "code": "e069",
      "msg": "Invalid authentication"
    }
  ]
}
Note: In a production environment, each customer/TIN must authenticate again.